Friday, November 2, 2012

Sleepless And Going Bananas


My pal Rick Rodgers www.rickrodgers.com, author of Thanksgiving 101 and too many other cookbooks to count, was in town just in time to escape the devastation back home in New Jersey.  We went to Bar César for lunch yesterday and, since November is still rosé weather in globally-warmer-than-ever Northern California, we each had a glass with our charcuterie and cheese… and then shared a second. We walked around the neighborhood afterwards, checking out the offerings at the Cheeseboard, the menu at Chez Panisse, and the chocolate chip cookies made with lard at the 1-year-old Local Butcher Shop. (The cookies were interesting but we really did miss the flavor and carmelization that comes with butter). We parted around 3:00, after tasting Hungarian tortes and sipping espresso at Crixa Cakes.  Such fun! But yikes!

To counter the buzz of alcohol, sugar, and caffeine (and lard?), I decided to walk the 2 miles home.

I was in bed but still awake at 2 AM, 3 AM, and 4 AM... then I gave up and played Words with Friends on my Iphone and exchanged silliness with David Lebovitz www.davidlebovitz.com on twitter for a while. I got up and cleaned out a drawer.  Back in bed, I worried about the election, wondered if the Buckwheat Walnut Crackers were baked at the right temperature, and finally started counting good things to do with bananas—instead of sheep.

I got this far: 

1. Grilled Sandwich: filled with sliced bananas, peanut butter and honey.

2. Bananas and Cream: slice bananas into a bowl with heavy cream and garnish with a couple thin orange slices, and perhaps a drop of orange flour water.

3. Bananas and Yogurt:  slice bananas into a bowl with plain yogurt, honey, and pistachios, walnuts, or peanuts.

4. Creamy Banana Yogurt “Pudding”: mash banana with an equal amount of plain yogurt. Sweeten and seasoned to taste with a bit of honey or brown sugar and pinches of cinnamon or cardamom. Top with chopped walnuts or pistachios. Top with extra pinches of spice.

5. Exotic Chocolate-Dipped Popsicles: mash bananas and season to taste with cinnamon, nutmeg, and cardamom. Freeze in popsicle molds, unmold and dip in chocolate (see below), and shower with optional chopped walnuts or sprinkles.

6. Chocolate Banana Blintzes:  fold three slices of banana and a spoonful of thick ganache into each crepe, as for blintzes. Keep refrigerated until ready to sauté (very briefly) in butter. Serve immediately.  Full recipe in Chocolate Holidays (Artisan, 2001) 

7. Ice Cream Sandwiches:  free banana slices until hard. Process them in a food processor until thick and creamy with a texture like soft serve ice cream. Return the mixture to the freezer to firm up.  Scoop and press between thin crunchy oatmeal cookies.  Serve immediately or store in a covered container in the freezer.

8.  Chocolate Dipped Bananas: impale bananas on sticks and freeze solid.  Dip frozen bananas in warm chocolate dip (see recipe below), and sprinkle with chopped peanuts, if desired.

9. Butterscotch Bananas Foster:  Cut bananas in half crosswise and cut each piece in half lengthwise. Make Butterscotch Sauce from Sinfully Easy Delicious Desserts (Artisan, 2012)using Bourbon or Scotch, or warm purchased sauce in a skillet.  Heat the bananas in the sauce and serve with vanilla ice cream.

10.  Chocolate Banana Waffles: Sauté banana slices in a little butter. Serve on chocolate waffles. Top with crème frâiche. Full recipe in Chocolate Holidays (Artisan, 2001)

11. Salted-Caramel Banana Bread Pudding: recipe in Sinfully Easy Delicious Desserts (Artisan, 2012)

I could have gone on, but blessedly fell asleep around 6 AM.


CHOCOLATE DIP FOR FROZEN BANANAS OR POPSICLES 
Bananas are so long and curved that you would have to triple the recipe to fill a container large enough to submerge a whole banana!  The solution is to make a banana shaped trough out of heavy-duty foil (as described in the recipe) so you can submerge the banana horizontally (in a custom shaped container) without needing too much extra chocolate.  A little clarified butter added to the chocolate prevents a super thick coating and produces a pleasingly crisp coating that is not too hard to bite. 

Makes about 1 1/3 cups, enough for a dozen or more popsicles or 6 to 8 medium bananas, frozen on sticks.

Ingredients:
10 ounces dark chocolate (I use Scharffen Berger 70% Bittersweet)
1/4 cup clarified butter (or ghee)
2 pinches of salt, more to taste
1 cup chopped nuts or chocolate sprinkles, optional

Put the chocolate, clarified butter, and salt in a stainless steel bowl set in a wider skillet with less than an inch of not quite simmering water.  Stir frequently until the chocolate is melted and the mixture is smooth.  Taste and adjust the salt if necessary, just to brighten the flavor of the chocolate, without making it salty.  Remove the bowl and let the chocolate cool to lukewarm. Line a tray with wax paper and set nuts or sprinkles close at hand, if using.

For popsicles: pour the chocolate into a narrow container deep enough to dip the entire popsicle.

For bananas: Place a large piece of heavy-duty foil loosely over a bread pan that is longer than a banana.  Using the pan for support, mold the foil into a narrow trough— slightly wider and longer than a banana and deep enough to submerge the whole fruit, held by the stick, and lowered with the curved side down.  Fill the trough with chocolate; refill the trough as necessary with the remaining chocolate.

Dip each popsicles or frozen banana into the chocolate and sprinkle immediately with nuts or sprinkles, if using.  Set dipped items on the lined tray.  Put the tray in the freezer until the chocolate is completely hardened. Transfer treats to a container or zipper lock bag and keep frozen until serving.  Excess dip can be kept in the fridge or freezer and used again. 

Tuesday, August 7, 2012

Ten Quick Smart Things To Do With Strawberries: Day Seven

I  had better finish up my 10 ideas for strawberries before strawberries go out of season! Fortunately this idea is good for fresh cherries too, not to mention figs.

Chocolate dipped strawberries(cherries, figs...)  are easy and fun to make.  Any child (of any age) would love to help you with dipping. Choose a brand of chocolate that you love to nibble. (And choose a bar of chocolate rather than chocolate chips or anything called “chocolate coating,” even if it is sold in the same aisle as the fruit. Chocolate chips won’t melt well, and the so called chocolate coating sold in the produce aisle is not delicious enough. No need to “temper” the chocolate to keep it shiny: the secret to preventing the chocolate from turning gray and streaky is to dry and chill the fruit before dipping, then refrigerate it as soon after dipping as possible.

CHOCOLATE DIPPED STRAWBERRIES

Serves 15 or more

Ingredients
About 2 pints small or medium strawberries (with or without stems), or up to 36 large
strawberries with stems, or 1 ¼ pounds cherries with stems

8 ounces bittersweet or semisweet chocolate, coarsely chopped, or milk or white chocolate, finely chopped

Equipment
Cookie sheets
Fluted paper candy cups (optional)

Rinse the fruit gently and spread it out on a tray lined with paper towels. The fruit should be as dry as possible before dipping; if necessary, pat it dry or use a cupped hand to cradle each piece gently in a soft dishtowel or a paper towel. Refrigerate until chilled.

Line the cookie sheets with parchment paper. Put the chocolate in a small heatproof bowl, preferably stainless steel. Bring an inch of water to a simmer in a wide skillet. If using semisweet or bittersweet chocolate, set the bowl directly in the skillet and keep the water at a bare simmer. If using milk or white chocolate, turn the heat off under the skillet and wait for 60 seconds before putting the bowl in the hot water.

Stir dark chocolate frequently, milk and white chocolate almost constantly, until almost entirely melted, then remove the bowl, wipe the bottom dry, and stir to finish melting the chocolate. The chocolate should be warm and fluid, but not hot. Grasp fruit by the stem or the shoulders and dip it about two-thirds of the way into the chocolate, or deeper if you like. Lift the fruit above the chocolate and shake off the excess, letting it drip back into the bowl, then very gently wipe a little excess chocolate from one side of the fruit on the edge of the bowl, set it on a lined cookie sheet, wiped side down, and slide it forward slightly to prevent a puddle of chocolate from forming at the tip. Refrigerate each tray as soon as it’s filled, and keep refrigerated until ready to serve. Serve any time after the chocolate has set enough that you can peel the fruit cleanly from the parchment. Transfer each one to a fluted candy cup, if desired.

If you are making chocolate dipped cherries, be sure to warn you guests that the cherries all have pits!

For more ideas for strawberries, see recent posts and my new book, Sinfully Easy Delicious Desserts (Artisan 2012) by Alice Medrich 

Monday, July 9, 2012

Ten Quick smart Things to Do With Strawberries: Day Six


STRAWBERRIES WITH WHIPPED CREAM AND HALVAH

Did you know that strawberries and sesame are divine together?

To find out, serve a bowl of ripe strawberries layered with chopped halvah (as much or as little as you like) and topped with unsweetened whipped cream and more halvah.

That’s the recipe. Really, that is all there is to it. 

I’m not even taking a photo. You know what strawberries and cream look like so just imagine it laced with bits of yummy, sweet, rich, sesame halvah. Alternatively, you can fold the halvah into the cream to make halvah whipped cream, and then slather the berries with it. Either way: delish!

There is only one problem with this recipe (not counting the possibility that you might actually dislike halvah, in which can you can skip to the last paragraph):

You have to go out of your way to find superb sesame halvah choices here in the US. The ubiquitous American-made halvah found in supermarkets, gourmet shops, and delis is disappointing.  I hope no one judges all halvah by that one.  Meanwhile, I have been tweeting and emailing with David Lebovitz www.davidlebovitz.com, @davidlebovitz) during his Israeli trip last week and drooling over his reports of great halvah (and hummus etc.).  And I’ve been remembering some stunning Lebanese (or was it Turkish?) halvah—with rose water and pistachios— that I tasted here, in a local Palestinian restaurant a few years ago.

So yes, even in Berkeley, one has to out of their way for good halvah. Having just written that, I realized that I regularly go out of my way for special ingredients, so why not spend an hour or two looking for halvah? I’ll bring home everything I can find within a reasonable radius and invite a couple halvah lovers in to taste. Then I’ll take a photo…

Meanwhile, back to strawberries and cream:  If you really hate halvah, or if you can’t find good halvah, or if you need instant gratification while looking for some good halvah, you can substitute crushed peanut brittle, almond brittle, or any kind of toffee with nuts, for the halvah. I didn’t say this would be the same as using halvah (not at all) but it will produce a very easy crowd pleaser: what’s not to love about crunchy, nutty, sweet, and buttery, bits of crushed toffee with berries and cream? I normally make my own caramelized nuts for this, but buying brittle or toffee while shopping for the berries and cream is quicker and very smart indeed.

For more ideas for strawberries, see recent and upcoming posts and my new book, Sinfully Easy Delicious Desserts (Artisan 2012) by Alice Medrich 

Wednesday, June 27, 2012

Ten Quick Smart Things to do With Strawberries: Day Five

STRAWBERRIES IN RED WINE

Open a modest bottle of red for this, or use wine left from a party. It's even ok to mix different kinds...no one will know.

Pour red wine over whole or halved ripe strawberries, adding about 2 tablespoons of sugar (to taste) per cup of wine and a squeeze of lemon juice. Macerate at room temperature for up to an hour, and then chill for up to an hour. Serve the fruit with some of it’s liquid.

Here is the bonus: 
After the strawberries are gone you may have lots of liquid left in the serving bowl. Simmer it until it has thickened to a syrupy sauce. Serve over vanilla ice cream, with or without new fresh strawberries. 

Photo by Sang An

For more ideas for strawberries, see recent and upcoming posts.  Also see my new book, Sinfully Easy Delicious Desserts (Artisan 2012) by Alice Medrich, page 48. 

Monday, June 25, 2012

Ten Quick smart Things to do With Strawberries: Day Four


Cocktail time at last!

Several years ago I celebrated the publication of my new book, Pure Dessert, with a party at the Hangar One/St. George Spirits Tasting Room. Better still (so to speak) the party was not actually in the tasting room, but in the hangar in front of the gorgeous copper still.  So chic yet industrial, and of course it smelled divine in there. Obviously we drank cocktails with all of the desserts. Two of them featured ripe strawberries.

THE ALICE COCKTAIL-aka THE BERRY FAIRY 
By Bay Area writer and mixologist, Lou Bustamante

1 muddled ripe strawberry
1/2 ounce lemon juice
1/2 ounce simple syrup
1 1/2 ounces Hangar One Mandarin Blossom Vodka 
1/4 ounce St. George Absinthe Verte

Shake all of the ingredients with ice, strain and serve up, in a martini glass. 


THE ANDIE/ALICE WHISKEY COCKTAIL
By Voka Vixen, Andie Ferman

1 1/2 ounces St. George Single Malt Whiskey (or a non-peaty single malt of your choice)
1/4 ounce lemon juice
1 muddled ripe strawberry
Dash of simple syrup

Shake all of the ingredients with ice, strain and serve up, in a sour glass. 


For more ideas for strawberries, see recent posts.  Also see my new book, Sinfully Easy Delicious Desserts (Artisan 2012), page 48. 

Thursday, June 14, 2012

Ten Quick Smart Things to do With Strawberries: Day Three


Does anyone else remember brunch in 70’s?  Yes, quiche was there, and very chic indeed.  But I especially remember this seriously simple and delicious dessert: a bowl of ripe strawberries was served, flanked with a dish of sour cream and a dish of brown sugar. Guests dipped a berry into the sour cream then into the sugar.  Finger food!  In more formal circles than ours, I suspect that each guest had their own little plate...

Either way, you can recapture and elevate this lovely retro dish by trading in ordinary brown sugar for dark muscovado sugar (one of my obsessions).  Stick with the sour cream (who doesn’t love sour cream?) or swap it for crème fraiche, or labneh, or drained yogurt, or any other slightly tangy or tart fresh cheese or cultured milk.  Could anything be easier?


For more things to do with ripe strawberries, see recent and upcoming posts.  Also see my new book, Sinfully Easy Delicious Desserts (Artisan 2012) by Alice Medrich.

Thursday, June 7, 2012

Ten Quick Smart Things To Do With Strawberries: Day Two

Make sorbet without an ice cream? No cooking either? You can prep this sweet and refreshing dessert in fewer minutes (not counting freezing time) than it would take you to go out and buy it. It’s also a perfect way to use those delicious leftover berries that no longer look party fresh. Preserves instead of sugar syrup contribute a smooth texture and complex flavor. Serve the sorbet plain or with a little whipped cream or a dab of crème fraîche right from the carton. Oh, and yes, you can skip the balsamic vinegar; just replace it with water. That’s it.

FURIOUSLY FAST STRAWBERRY (BALSAMIC) SORBET
Makes almost 3 cups

Ingredients
1 pound (4 cups) ripe, flavorful strawberries
½ cup plus 2 tablespoons strawberry (or raspberry) preserves
Pinch of salt
A small lemon
2 teaspoons fresh lemon juice, or to taste
4 teaspoons balsamic vinegar, or to taste
¼ cup water

Equipment
Food processor or blender

Rinse and hull the berries and put them in the food processor or blender with ½ cup of the preserves and the salt. Finely grate zest from half of the lemon into the processor bowl. Puree until smooth. Add the lemon juice, vinegar, and water and pulse to mix. Taste and add the remaining jam as necessary for sweetness and adjust the lemon juice, vinegar, and salt if necessary. The puree should taste a bit sweeter than you think it should and have a little zip to it.


Scrape the mixture into a shallow pan, cover, and freeze until hard, 3 to 4 hours.


Break the frozen mixture into chunks with a fork and process in the food processor or blender until there are no more frozen pieces to process, stopping to redistribute the mixture from time to time, until it is smooth and creamy and lightened in color. 


It may be frozen enough to serve right out of the food processor, or you can scrape it into a container and return it to the freezer until needed. If the sorbet freezes too hard, let it soften in the fridge for about 15 minutes, or carefully soften it in the microwave on the defrost setting, a few seconds at a time.


For more ideas for strawberries, see my new book, Sinfully Easy Delicious Desserts (Artisan 2012) by Alice Medrich, page 48.

Tuesday, June 5, 2012

Ten Quick Smart Things To Do With Strawberries: Day One


I know. No one really needs a recipe for serving ripe strawberries topped with whipped cream, right? But I thought I would start with my basics (Alice’s Rules, so to speak) and let everyone take it (or not) from there.   

The strawberries: Start with great tasting berries. Don’t assume that the biggest strawberries are the best; the big guys are often the least tasty and odd shaped and odd sized small ones are sometimes spectacular. Great strawberries don’t need to be sugared, and unless you prefer otherwise, and you needn’t sweeten the cream either! If you don’t shop at a market (or farmers' market) where tasting is assumed, ask for a taste before you buy. You will be surprised at how often you will get a “yes”. Make friends with that farmer or produce person, you are going to need him/her (and a knife) later, when melons are in season!

Here’s how to keep ripe strawberries in good condition for several days: when you get home from the market pick through and discard any berries with a moldy or otherwise rotten spot. Spread berries (without rinsing them) in a single layer on a double layer of paper towels in a shallow container. Cover the berries with another paper towel. Cover and refrigerate the container. They should last for several days this way. Rinse and hull berries as you need them


The cream: Use great cream. Look for only one ingredient on the carton or bottle: cream. Don’t buy pre-sweetened cream or dairy topping or cream in an aerosol can (yes, I know how much fun that can be…but save it). The best tasting cream is not ultra-pasteurized nor is it stabilized with carrageenan (or anything else). Ultra-pasteurized cream has the faint flavor of canned milk and carrageenan produces a silky texture at the cost of flavor…

If you add vanilla extract to your cream, use pure (not artificial) extract. Don’t believe anyone who says no one can taste (or smell) the difference. Vanilla is nice, but not essential to good whipped cream. 

If you sweeten your whipped cream, use granulated rather than powdered sugar. Powdered sugar tastes faintly of the starch that is added to keep the sugar from clumping. Adjust the sugar towards the end of beating; sweetened cream tastes less sweet when it is fluffy than when it is fluid.

Reminder: Cream must be very cold or it will not whip properly: it will either refuse to thicken or it will curdle. If you are just back from the store and the cream has been in your shopping basket and car for a while, refrigerate it again before you try to whip it. Start with a chilled bowl and beaters for a little extra whipped cream insurance!

Whipping the cream: Using chilled beaters (or a hand held whisk), beat 1 cup of cream with ½ teaspoon or more vanilla (if using), in a chilled bowl until it holds a soft shape. Gradually add 2-3 teaspoons sugar (to taste), and beat until it holds a good shape but is not too stiff.

For more things to do with strawberries, see upcoming posts. And see my new book, Sinfully Easy Delicious Desserts (Artisan 2012) for more strawberry ideas and ten ways to flavor whipped cream!

Saturday, May 19, 2012

Love To Cook, Hate To Bake?


My eighth book, Sinfully Easy Delicious Desserts is just out. You might be thinking, “what, another dessert book, can’t she give it a rest?”

What’s new, fun, and interesting about Sinfully? 

After seven books, I’ve shifted my perspective from baker to cook. I’ve always noticed that people who love (and are good at) baking think and learn differently than people who love (and are good at) cooking.  How many fantastic Top Chef candidates get knocked out of the competition because they can’t make a good dessert?  How many good home cooks put out fabulous, seemingly effortless meals with a store-bought dessert finale? Maybe this is you. Maybe you find baking too finicky or constraining. Maybe you like to taste and adjust as you cook; maybe you hate to follow a recipe exactly, or don’t like to measure precisely.  Maybe your cakes and cookies are more like doorstops and paperweights…

All cooks need simple sensational little desserts up their sleeves: clever easy things to do with fruit or ice cream, or a lightening quick gingerbread, a great little sauce, compote, or pudding, or a easier-than-it-looks soufflé.  We all need recipes that are simple but not simple minded, terrific but not time consuming, compelling but not complicated.

My editor (a very stylish cook who hates to bake) delights in saying that Sinfully is the dessert book with no pastry bags, pastry brushes, rolling pins, offset spatulas, or baking skills!

Visit my brand new and beautiful website (see previous post!) at http://alicemedrich.com/ to learn more about the book or check out my touring schedule. Maybe I will see you this week in Petaluma, San Diego, Westlake Village, New York (in late summer), or elsewhere in the Fall. 

My New Website


The title of this post suggests that I have redesigned or remodeled my old website.  That would be nice.  But the reality is that this is my very first website and it is now live. Finally. It took as long to design and launch as it me took to write an entire book, which I also did in the meanwhile (see right and my next post). The site is quite pretty (as is the book) which I feel ok about saying, since I did not design it myself. I am grateful to The Engine Room and Doug Ridgeway for that. I am pleased. I am also thrilled to cross it off my interminable to do list.


Even if you are not interested in my bio, book tour itinerary, list of books, video course, vintage and current media or video clips…You will find lovely photos and favorite recipes, and I will be adding more of both (especially from Sinfully Easy Delicious Desserts) anon. Since I am a complete newbie when it comes to websites, your comments are welcome. Come on now, take a look!


Monday, April 16, 2012

Alice in Videoland Part Two


If you haven’t seen the preview of my video course, check it out at http://www.craftsy.com/class/Decadent-Chocolate-Cakes/64 .

The beauty of a video course, and what makes it different from food TV, is that there is no rush to fit into a five-minute morning news slot or even a half-hour program. I get an opportunity to actually teach, as though I had a live class. I can explain all of the “ifs” “ands” or “buts,” discuss options, talk about what to do if something goes wrong, or what may happen if you don’t do it my way! I can give options and really get into things. It’s not purely about entertainment, although it is beautiful to watch. What more could I have wished for?

Maybe you’ve always wanted to perfect a show-off special occasion cake, master chocolate ruffles, or learn a little more about working with chocolate. Maybe you know an aspirational baker or cook who doesn’t have access to or funds for a cooking course?  This one is a bargain. It can be watched over and over again, and it’s interactive: students can chat with me, ask questions, and interact with others taking the same class.  I’m having my morning coffee these days while answering student questions.  And I’m learning from the questions too!  The Craftsy platform is pretty cool. I’m pretty psyched. 

Confession:   A couple of the recipes in the course are simpler to make than they look, which means that you can produce a gorgeous torte with perfect marbled glaze, or a whimsical chocolate centerpiece with far less effort than anyone will guess when they look at your results!

Friday, April 13, 2012

Alice In Videoland


Chatting with a serious documentary filmmaker decades before there was SO much food on TV, I expressed the opinion that the processes involved with chocolate and dessert making would look good on film.  She didn’t really get it! I explained how visual it all was: luxurious chocolate glaze flowing over a cake, up-close brush stokes marbleizing that glaze with milk chocolate so it looks like Italian or French art paper, deckle-edge ruffles of pure chocolate pealing off of a sheet pan, even the technique of beating and folding egg whites properly, lovingly, expertly, into a chocolaty batter. I thought it could be instructional and exquisitely beautiful. She looked dubious. I kid you not.

Decades later we have endless food TV—so what else is new?

Recently my publisher proposed that I teach video classes to support the launch of Sinfully Easy Delicious Desserts (out next month, btw). We discussed the recipes during a very enthusiastic conference call with the lifestyle editor at craftsy.com, who would be our partner in this video adventure. In the back of my mind, I was vaguely disappointed. I was finally doing video, but with the wrong content! I love my new book, but Sang An’s photography is already amazing, and the whole point of Sinfully Easy is that no one needs video to succeed with the recipes!

Then a miracle happened. The Craftsy team “remembered” that their audience of passionate crafters and DIY-ers loves ambitious projects and are eager to learn technique. They want to learn skills, not just recipes. Sinfully Easy was too damn —easy (yay!)—and thus not ideal for video. Would I consider scrapping the original plan and coming up with a list of more challenging desserts?

It took me three minutes to get a new menu on paper.

The course launched last week and you can see a little preview of it here: http://www.craftsy.com/class/Decadent-Chocolate-Cakes/64

Thursday, March 8, 2012

Chocolate Hamantaschen

What?  Purim already?  I know people who don't like Hamantaschen because they don't like poppy seeds especially, or prune filling,  or anything else reminiscent of the Jewish cookies of childhood.  Well, I do like  (love, even) poppy seeds and prunes and the like,  but I am sensitive to the needs of others.  So I offer you this very good recipe for Hamantaschen filled with CHOCOLATE.  I think everyone will be happy  now.  Try it, you'll like it!


CHOCOLATE HAMANTASCHEN

Forget poppy seeds, prunes, or apricots! Here, Haman’s Hat brims with bittersweet brownie filling and these cookies should NOT be saved for a Jewish, or any other, holiday

Makes 3 dozen cookies

Ingredients for Filling:
6 tablespoons (3 ounces) butter
4 ounces unsweetened chocolate
3/4 cups (5.25 ounces) granulated sugar
1 teaspoon vanilla extract
1/4 teaspoon salt
2 large cold eggs
2 tablespoons all-purpose flour 

Ingredients for Cookie Dough:
2 cups (9 ounces) unbleached all-purpose flour
1/4 teaspoon salt
1/2 teaspoon baking powder
8 tablespoons (4 ounces) unsalted butter, softened but not squishy
1 cup (7 ounces) sugar
1 large egg
2 teaspoons vanilla extract

Equipment: 
Cookie sheets, lined with parchment paper
A 3-inch round cookie cutter

Make the filling: Melt butter with chocolate in a stainless steel bowl set in a wide skillet of almost simmering water.  Stir frequently until the mixture is melted and smooth.

Remove the bowl from the water. Stir in the sugar, vanilla and salt.  Add the eggs one at a time, stirring in the first until incorporated before adding the second.  Stir in the flour and beat with a spoon until the mixture is smooth and glossy and comes away from the sides of the pan, about one minute.  Scrape into a small bowl, cover and refrigerate until needed.

Make the cookie dough: Whisk the flour, baking powder and salt together thoroughly and set aside.

In a large bowl beat the butter and sugar with an electric mixer until light and fluffy, 3 to 4 minutes.  Beat in the egg and vanilla extract.  On low speed, beat in the flour just until incorporated. Form the dough into two flat patties.  Wrap and refrigerate the patties at least until firm enough to roll, but preferably several hours or overnight.

Preheat the oven to 350F.  Position racks in the upper and lower third of the oven.

Remove one of the patties from the refrigerator and let it sit until supple enough to roll but still quite firm.  It will continue to soften as you work.  Roll the dough between 2 pieces of wax paper or between heavy plastic sheets from a plastic bag to a thickness of 1/8 inch.  Turn the dough over once or twice while you are rolling it out to check for deep wrinkles; if necessary, peel off and smooth the paper over the dough before continuing to roll it.  When the dough is thin enough, peel off the top sheet of paper or plastic and keep it in front of you.  Invert the dough onto that sheet.  Cut cookies as close together as possible, dipping the edges of the cutter in flour as necessary to prevent sticking.  Press dough scraps together and set aside to reroll with scraps from the second patty.

Place cookies 1/2 inch apart on the prepared cookie sheets. Scoop and place a level teaspoonful of filling in the center of each cookie. Bring three sides of each cookie up to partially cover the filling.  Pinch the edges of the cookies well, to seal the corners.  Bake 12 minutes or until pale golden at the edges, rotating the cookie sheets from top to bottom and front to back half way through the baking. Repeat until all of the cookies are baked.

Slide the parchment liners onto cooling racks.  Cool the cookies completely before stacking or storing. 

Oh, and sorry, no photos today. I just now realized that it was Purim in the first place. 

Monday, February 6, 2012

What I Love About Genoise


I make genoise twice a year whether I like it or not.  I make it when I teach at Tante Marie’s Cooking School www.tantemarie.com because Mary Risley (Tante Marie) believes that all aspiring professional culinary students should be able to make genoise.    Despite its old school reputation, I do like genoise. And I agree with Mary, though I’m not sure working pastry chefs in this country actually make it very often. 

The problem with genoise is that Americans like super moist cake and genoise was never meant to be moist. The other problem is that, knowing that genoise is not meant to be moist, many chefs make it inedibly dry—which perpetuates the bad rep for genoise.  I don’t accept inedibly dry genoise.  I appreciate the usefulness of a cake that is dry enough to be soaked with flavorful liquids, but I pride myself on nibble-worthy genoise, one that soaks well but might not really need all of the usual primping, poking, soaking, and fussing that goes on in classical patisserie.

Meanwhile—and this is the part I love— the production of good genoise is an ode to technique, a paean to the details that make a difference.  I privately think it separates the women from the girls…

With only four ingredients plus salt and vanilla, you can mix up a genoise in less time than it takes to preheat the oven.  Simple right?  But if you don’t measure correctly (please buy a scale) or fold properly, or if you don’t know how to prevent tiny flour balls or a rubbery bottom layer, then sister you are cooked. 

To raise the stakes still higher, I like to use the smallest weight of flour possible.  This means that there can be no unnecessary moisture in the batter or the cake will sink in the center as it cools.  To that end I use clarified or browned butter or ghee—and I’ve even used olive oil.  And, the quantity of flour called for in the recipe is correct only for the type of flour called for.  If you use flour other than the unbleached all purpose flour called for, you may need to adjust the quantity of it to get my perfect cake. 

Here’s a preview of the chocolate genoise that I’ll make at Tante Marie’s Cooking School on the day after tomorrow, February 8th.  I will use it to build a spectacular cake wrapped in a sheet of chocolate and filled with rummy bananas, bittersweet chocolate mousse, and whipped crème fraîche, and I’ll top it with chocolate ruffles. You can do something similar with your genoise, or you can just nibble the cake plain with your coffee! 

Or, you can click on the link above and sign up for the class.  Mary always leaves a few spaces open for the public.


ALICE’S  CHOCOLATE GENOISE
I urge you to use a scale for this recipe and check out the notes below for tips and greater understanding of what’s going on in the recipe.

Ingredients:
1.5 ounces (3 tablespoons) hot clarified unsalted butter
1 teaspoon vanilla extract
1.6 ounces (1/3 cup plus 1 tablespoon sifted) unbleached all-purpose flour
1.2 ounces (3/8 cup unsifted) unsweetened cocoa powder (see notes)
4 large eggs
4.3 ounces (2/3 cup) sugar
1/8 teaspoon salt

Equipment:
8x2 inch round cake pan
Electric mixer with whisk attachment

Preheat the oven to 350 degrees F with a rack in the lower third.  Line the bottom of the pan with parchment paper. Do not grease the sides of the pan.

Combine clarified butter and vanilla in a 4-cup stainless steel bowl and keep it hot until needed by setting it in a pan of almost simmering water.  Or put it in a microwave safe bowl and be prepared to zap it just before using it.

Whisk the flour and cocoa together thoroughly and sift it (or shake it through a sieve) three times and return it to the sifter/sieve and set aside.

In a stainless steel mixing bowl (I use my 5 quart Kitchen Aid mixer bowl) whisk the eggs, sugar, and salt to blend.  Set the bowl on a low flame and stir (sweeping the sides and bottom of the bowl constantly to prevent scrambling) just until the eggs are lukewarm to the touch.

Remove the eggs from the heat and beat them at high speed with an electric mixer until they have cooled, tripled in bulk, and have the texture of very softly whipped cream (a ribbon of batter should dissolve very slowly on the surface of the batter).

Sift about one-third of the flour mixture over the eggs.  Fold with a large rubber spatula until the flour is almost blended into the batter. Repeat with half of the remaining flour.  Fold in the last third of the flour.  Add about 1 cup of batter to the hot butter.  Fold until blended.  Scrape the buttery batter over the remaining batter and fold just until blended. Scrape the batter into the pan.

Bake until cake springs back when pressed gently with fingers, 25-30 minutes.   Set the pan on a rack to cool.


At your convenience (the cake can be warm or completely cool), run a small spatula around the inside of the pan, pressing against the sides of the pan to avoid tearing the cake.  Invert the pan to remove the cake and peel off the parchment liner.  Turn the cake right side up to finish cooling. The cake should be completely cool before filling, frosting or storing.  The cake may be wrapped airtight and stored at room temperature for 2 days, or frozen up to 3 months.

NOTES
Cocoa Powder? I like Scharffen Berger Natural Cocoa Powder.  You can use a Dutch process cocoa if you prefer it.

Flour balls in your genoise? These are prevented by whisking the cocoa and flour together and then sifting the mixture a few times before sifting it into the batter, as described in the recipe.  For plain genoise, (without cocoa) whisk 2 or 3 tablespoons of the sugar from the recipe into the flour before sifting several times.  Interspersing the grains of flour with either cocoa or a little sugar plus fluffing and aerating the mixture separates the grains of flour (to prevent clumping) and makes it easier to fold it into the egg foam without deflating it.

Rubbery bottoms on your genoise?  This is prevented by folding a little of the batter into hot butter before folding everything together, as decribed in the recipe.

Awkward folding? If your mixer bowl is tall and narrow (like Kitchenaid mixer bowls), you might want to transfer the egg foam into a larger wider bowl to make it easier to fold in the flour and butter.

Monday, January 30, 2012

Carrot Improv


After enjoying Mourad’s Lahlou’s carrot soup with its fresh carrot juice and vanilla (see my last post, Where Ideas Come From),  I decided to try a little riff.  Instead of his touch of curry, I used a very small amount of fresh ginger, nutmeg, and citrus zest.  I cooked the carrots in water, puréed them and reheated the puree briefly with fresh carrot and orange juices and a couple drops of vanilla.  The resulting soup had a clean, bright, fresh carrot flavor from that last minute addition of raw juice, and because I used very little fat and no cream at all in the soup. It was compellingly carrot-sweet but not too sweet and the drops of vanilla added a very subtle savory note. It seemed a bit more like a light spring soup than a rich winter dish.  I did not keep track of everything perfectly, since I was just fooling around (and rather hungry) so you will have to make do with my notes.

CARROT AND CITRUS SOUP
In a covered heavy bottom saucepan over medium to low heat, soften in a little olive oil or butter, without browning:  ½ sliced onion, two peeled garlic cloves, about ½ teaspoon grated ginger, and a sprinkling of salt.  Stir from time to time. Add about 3 cups sliced carrots, cover and cook for another 5 to 10 minutes without browning. 

Add 2-3 cups water, more salt, and a strip of orange zest removed with a vegetable peeler (about 3 inches long and ½ inch wide). Cover and simmer until the carrots are tender, about 30 minutes.  Fish out and discard the zest.  Use a slotted spoon to transfer the vegetables to food processor and process them until smooth, adding liquid from the pot gradually. Scrape the mixture back into the pot. Add about 2/3 cup fresh carrot juice, the grated zest of about 1/4 of the orange, juice of half of the orange, a pinch or two of nutmeg and white pepper, and a drop or two of vanilla extract.  Reheat the soup, thinning it with a little water if necessary. Correct salt and seasonings (including zest and orange juice) to taste.  Serve hot.

I think the recipe made 3-4 cups.  It was good and I ate most of it up myself without measuring the yield—and I forgot to snap a photo until it was pretty much too late.  Such is the nature of hunger for carrot soup on a Sunday afternoon.   Mint leaves or cilantro would have been a lovely garnish, and maybe a dab of crème fraiche…but again, too late.

I liked it enough to make again.


Why are there so many carrot posts on this blog? I really don’t know.

Friday, January 27, 2012

Where Ideas Come From


I love cooking from other chefs’ recipes. I follow a recipe closely the first time because I want to taste what the chef was thinking and tasting.  I’m also curious about the recipe writing (this is an occupational hazard).   If there is something unusual about the technique or use of ingredients, I want to learn from it rather than assuming that my usual way of doing something will be better or just as good. I think cooks who pride themselves on never following a recipe exactly sometimes miss out on some spectacular outcomes and amazing nuances, but that’s another post for another day. 

Once I taste a dish, ideas come even (especially?) if the dish is fantastic.   It’s not always about improving a recipe, but about using something learned from it to do something else. Sometimes a recipe creates a spark that flies pretty far from the original fire. 

When I made carrot soup from Mourad Lahlou’s Mourad: New Moroccan, I was intrigued that the carrots were cooked in carrot juice instead of stock and each serving was garnished with fresh citrus.

The soup was lovely.  I started to imagine a new carrot soup with raw carrot juice added at the very end to capture both the bright flavor of raw and the lower and mellower notes from the cooked carrots.  Then I drifted to carrot sorbet made from a combination of cooked carrots and raw juice.  And now I thinking about a carrot duet: a smooth creamy carrot ice cream to serve next to a scoop of icy carrot sorbet.  Wait for it...


Meanwhile, a salad from Paula Wolfert’s Couscous and Other Good Food From Morocco inspired this  seductive dessert, which will appear in my own upcoming book, Sinfully Easy Delicious Desserts (coming May 2012 from Artisan Books).


FRAGRANT ORANGES WITH ICE CREAM, ALMONDS, AND DATES
From Sinfully Easy Delicious Desserts (Artisan 2012)

Scoops of creamy vanilla ice cream and icy mango sorbet in a pool of juicy scented orange segments with sticky dates, toasted almonds, and a fragrant top note of cinnamon. Serves 6

Ingredients:
8 oranges
1/4 teaspoon orange blossom water, or to taste
6 small scoops vanilla ice cream
6 small scoops mango or orange sorbet
12 plump dates, pitted and quartered
1/3 cup (1.5 ounces) chopped toasted almonds or toasted slivered almonds
A cinnamon stick (optional)

Equipment:
Microplane zester (optional)

Up to 1 day before serving, prepare the oranges: Suprime 6 of the oranges or simply peel and slice them, reserving the juices. Pick out any seeds and collect all of the juices and the segments or slices in a bowl.

To serve, taste the juice and adjust the orange flower water if necessary. Divide the oranges and juices evenly among six serving bowls. Nestle a small scoop of ice cream and a small scoop of sorbet in the center of each bowl. Distribute the quartered dates around the ice cream and sprinkle each dessert with the chopped almonds. Grate a little bit of the cinnamon stick over each bowl with a microplane zester, if desired, and serve immediately.

Friday, January 20, 2012

Crabby When Wrong


“I may be wrong but” is one of the ways I preface a statement when I really think I'm right but trying not to be too obnoxious.  Which is probably fairly obnoxious…

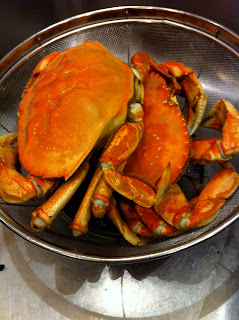
For years I’ve cooked Dungeness crabs in plain boiling water, no spices (horrors) and no salt.  The crabs are always stunningly delicious and sweet.  Divine really. But meanwhile my fishmonger, Paul Johnson (owner of Monterey Fish and author of 2008 IACP Cookbook of The Year, Fish Forever) insists that lots of salt in the water is really important.  I’ve been nagged by cognitive dissonance—I think Paul is fantastic AND I think my boiled crabs are fantastic.  I finally decided to test.  I bought two crabs—lets not tell Paul that all of the crabs at Monterey Fish were spoken for on the day I woke up with this bee in bonnet, and so I had to buy them across town... 

I boiled two big pots of water.  Into one pot I measured exactly ¼ cup of sea salt for each gallon of water, so you (or Paul) couldn’t say I didn’t do it exactly right. 

I took photos of the pots of boiling water and the crabs, so that when I turned out to be right, I could post the story with photos. 


The crab cooked in unsalted water was divine, just as I thought. 

But the crab cooked in salted water was a little bit more divine. 


Okay.  Okay. 

I’m posting anyway.